With clutter-free and pristine living space being the dream of many, these necessary house cleaning steps are here to make that dream a reality. Each step is carefully curated to ensure efficiency and effectiveness in achieving a sparkling home. From tackling the most stubborn stains to organizing every nook and cranny, these steps will leave your home looking and feeling refreshed.
As you begin this cleaning journey, pay close attention to the details that often go unnoticed but make a difference. From dusting high surfaces to deep cleaning overlooked areas, thoroughness is critical to achieving that coveted sparkling finish. With these ten steps, you’ll be well-equipped to transform your living space into a sanctuary of cleanliness.
Get ready to elevate your cleaning game and witness the transformation unfold. These steps aim to deliver immediate results and establish a maintenance routine to keep your space sparkling in the long run. Stay tuned as we explore each step deeper to help you achieve the ultimate house cleaning success.
Key Takeaways:
- Create a Plan: Developing a systematic approach to cleaning will help you stay organized and efficient.
- Declutter First: Removing clutter will make cleaning easier and ensure that surfaces are properly cleaned.
- Use the Right Tools: Proper cleaning supplies and tools will help you achieve better results in less time.
- Work from Top to Bottom: Start cleaning high surfaces and work your way down to prevent recontamination of cleaned areas.
- Clean Regularly: Regular maintenance cleaning will prevent dirt and grime buildup, making it easier to keep your home clean.
- Focus on High-Touch Areas: Pay extra attention to frequently touched surfaces like doorknobs, light switches, and countertops.
- Delegate Tasks: Get your family members or roommates involved in the cleaning process to divide and conquer for a faster and more effective cleaning.
Declutter Your Spaces
 Sort Belongings
A cluttered space can be overwhelming and chaotic. To tackle decluttering effectively, start by clearly sorting your belongings into categories. Designate separate piles for items to keep, donate, sell, or discard. This process will help you distinguish between vital items and those you can live without. Remember, the goal is to create a more organized and spacious environment that promotes mental clarity and productivity.
Dispose Responsibly
If you have sorted through your possessions and identified items for disposal, handling this task carefully is crucial. Regarding disposing of household items, if they are still in usable condition, consider donating them to local charities or thrift stores. Explore recycling options or proper disposal methods to avoid contributing to environmental pollution for items no longer functional or in poor condition.
Decluttering enhances the aesthetic appeal of your living space and contributes to a healthier and more organized lifestyle. By responsibly sorting through your belongings and disposing of unnecessary items, you pave the way for a clearer mind and a more functional environment. Embrace decluttering as a step towards a more fulfilling and harmonious living space.
Start with Dusting
The first step in achieving a sparkling clean home is dusting. Dusting may seem simple, but it is crucial in preparing your home for a deep clean. Dusting helps remove allergens, improves air quality, and sets the stage for thoroughly cleaning all surfaces.
High surfaces first
An essential aspect of dusting is to start with the high surfaces first. Dust particles settle on top of shelves, cabinets, and ceiling fans, so tackling these areas is imperative before moving on to lower surfaces. Use a microfiber cloth or a duster to gently wipe away the dust, ensuring you reach even the most challenging corners and crevices.
Working on high surfaces first prevents lower areas’ recontamination and avoids spreading dust around. This systematic approach ensures you thoroughly remove dust from your home, creating a healthier living environment for you and your family.
Work downwards
On a side note, make sure to work downwards as you dust. Starting at the top and working your way down prevents the need to re-dust lower surfaces due to dust falling from higher areas. This technique is essential when dusting ceiling fans and light fixtures, as debris can quickly scatter and settle on lower surfaces.
With a systematic approach focusing on high surfaces first and working downwards, you can achieve sparkling results in your house cleaning routine. Recall dusting is not just about making your home look clean – it’s about creating a healthier and more comfortable living space for you and your loved ones.
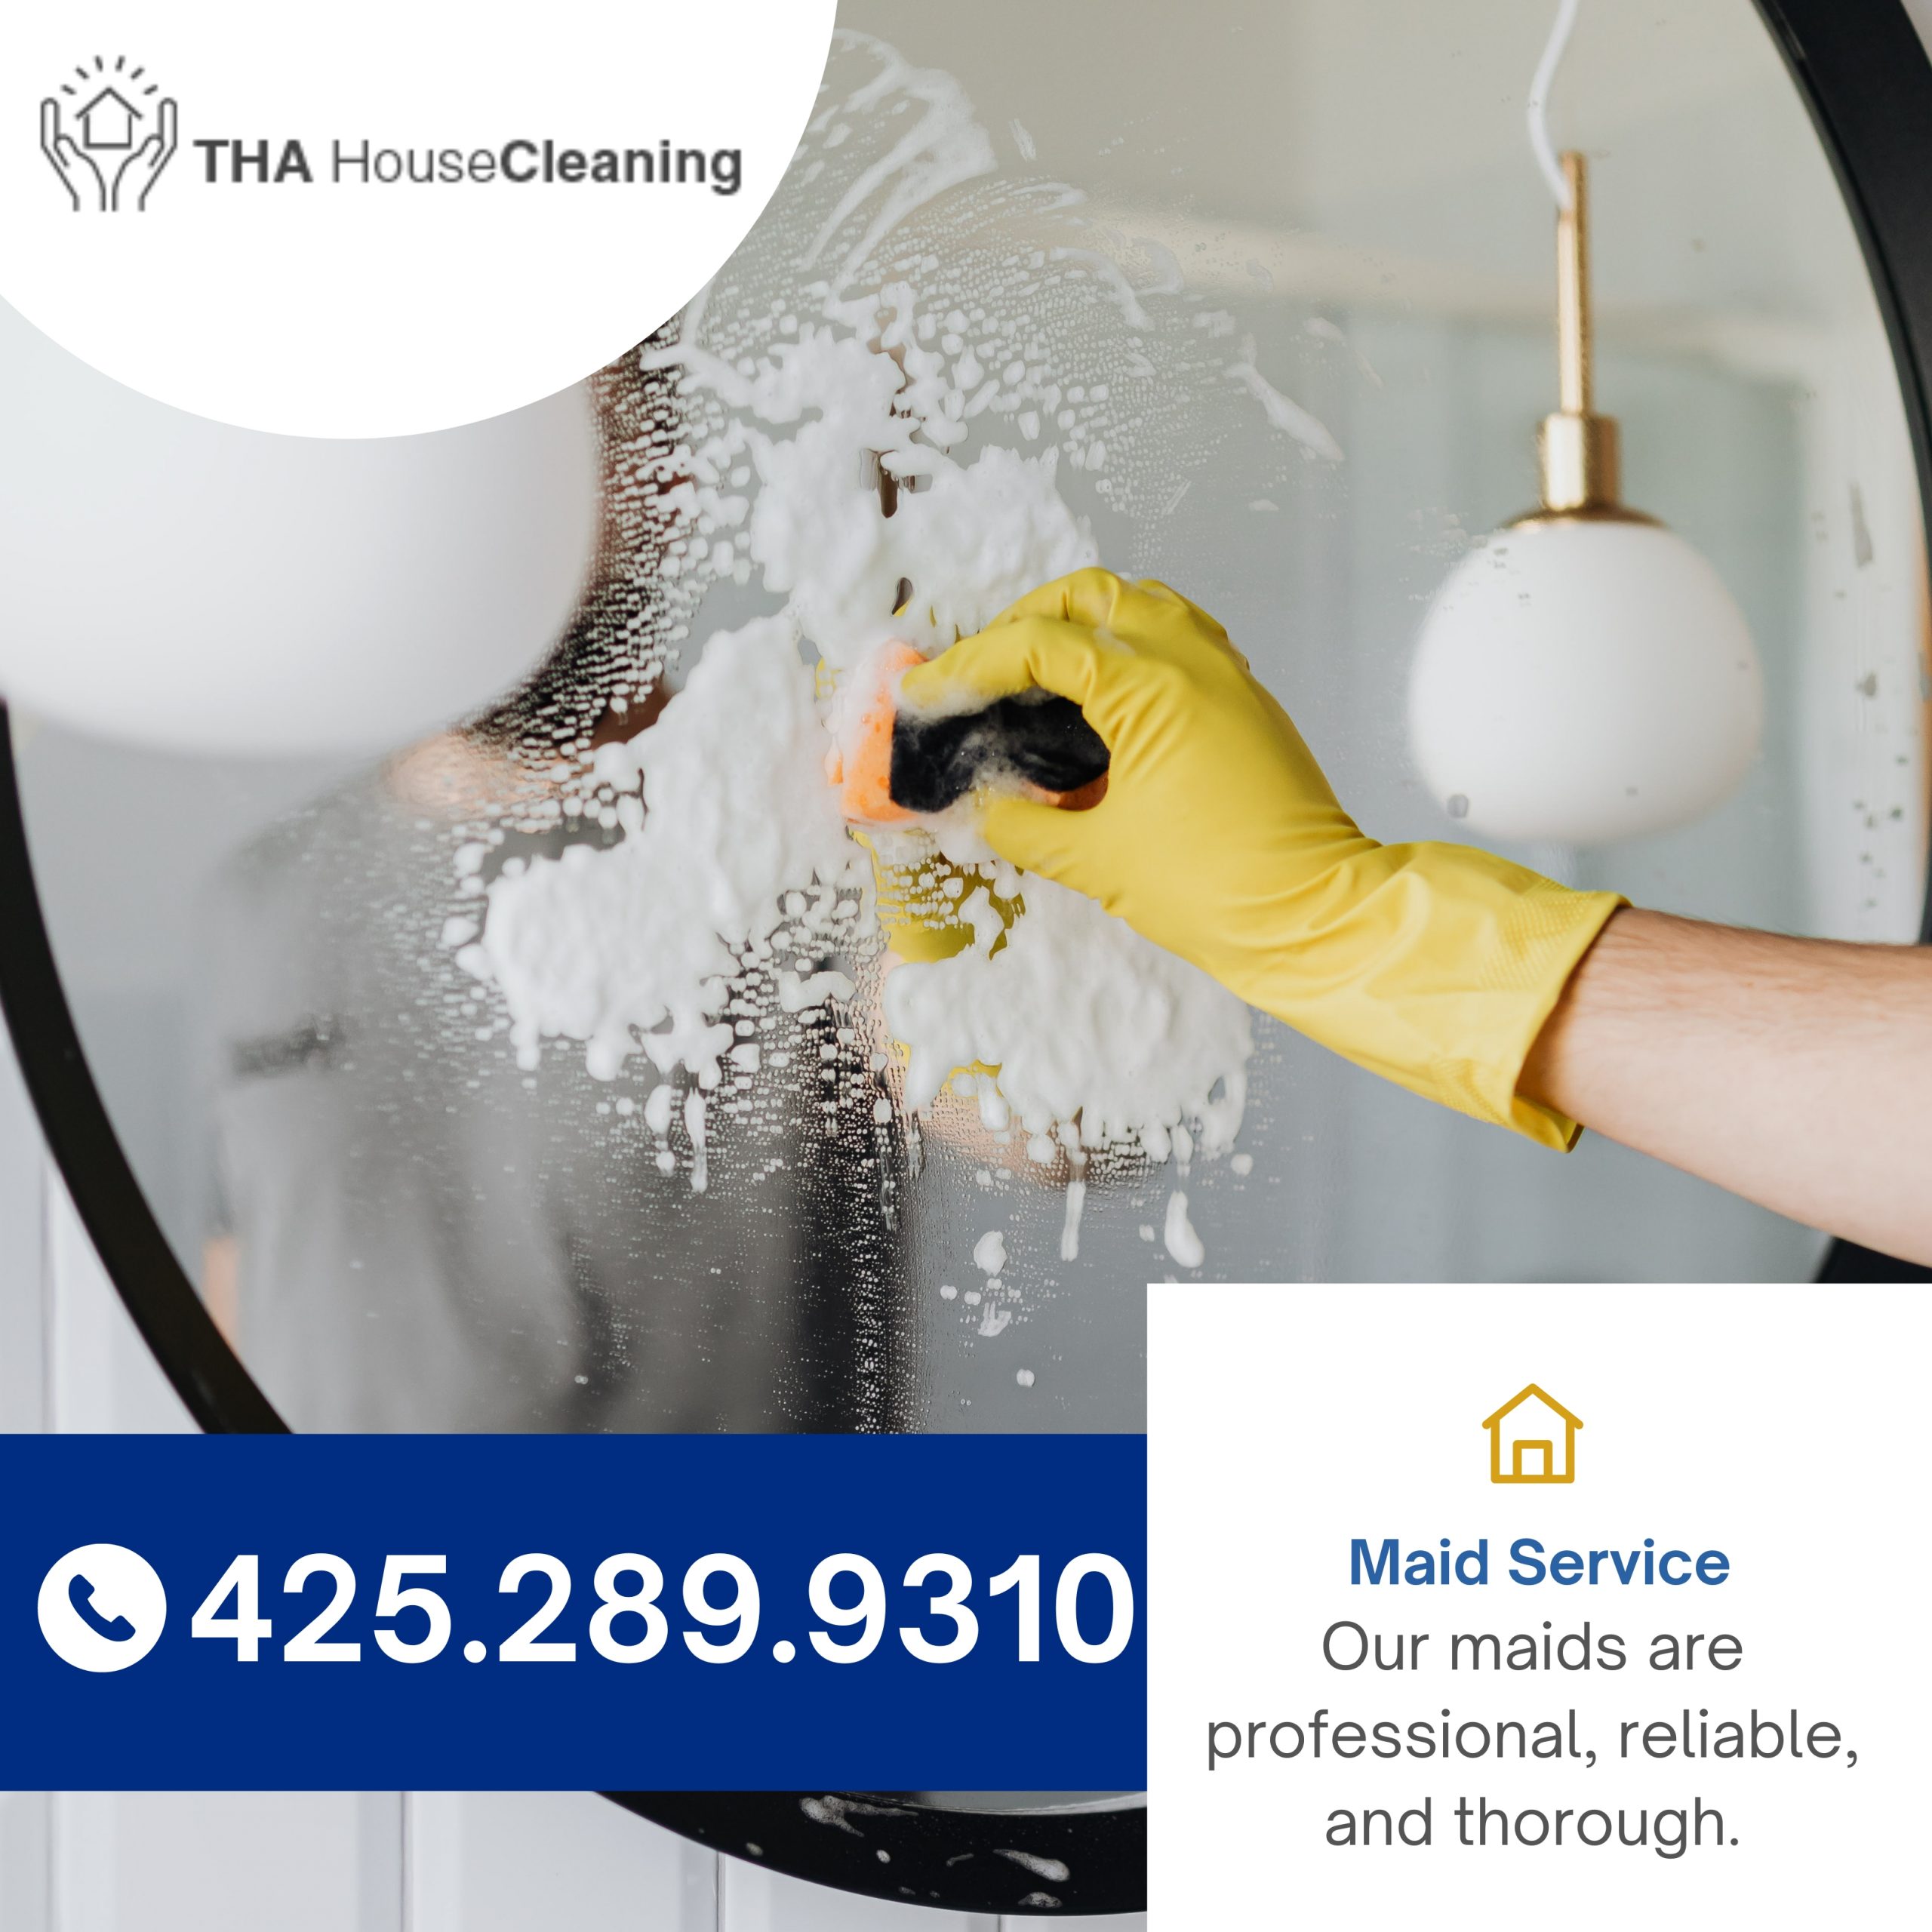
Clean Windows and Mirrors
Streak-free solutions
To achieve spotless windows and mirrors, you don’t need fancy products. Any everyday household items can be used as streak-free solutions. Distilled white vinegar and water remove dirt and grime, leaving a shiny finish. Another simple homemade solution is a mix of water and dish soap in a spray bottle. Just spray, wipe, and admire the streak-free results!
For stubborn spots or filthy windows, consider using commercial glass cleaner sparingly. Any excess product can create streaks, so remember to wipe thoroughly with a clean, dry microfiber cloth. Take care to reach all corners and edges for a spotless finish. With these robust solutions, your windows and mirrors will sparkle like new.
Wipe thoroughly
To ensure a genuinely spotless result, it is crucial to wipe thoroughly after cleaning. Always use a clean and dry microfiber cloth for the final wipe-down to prevent streaks. To avoid missing any spots, work in small sections and check your work from different angles to catch any remaining streaks. To remove any lint or dust particles left behind, consider using a second dry microfiber cloth for a final polish.
You can also use newspapers as an eco-friendly alternative to paper towels. The ink acts as a polishing agent, helping to achieve a streak-free shine. Remember that the key to spotless windows and mirrors is in the details – you should not rush the process and take the time to wipe thoroughly for impeccable results.
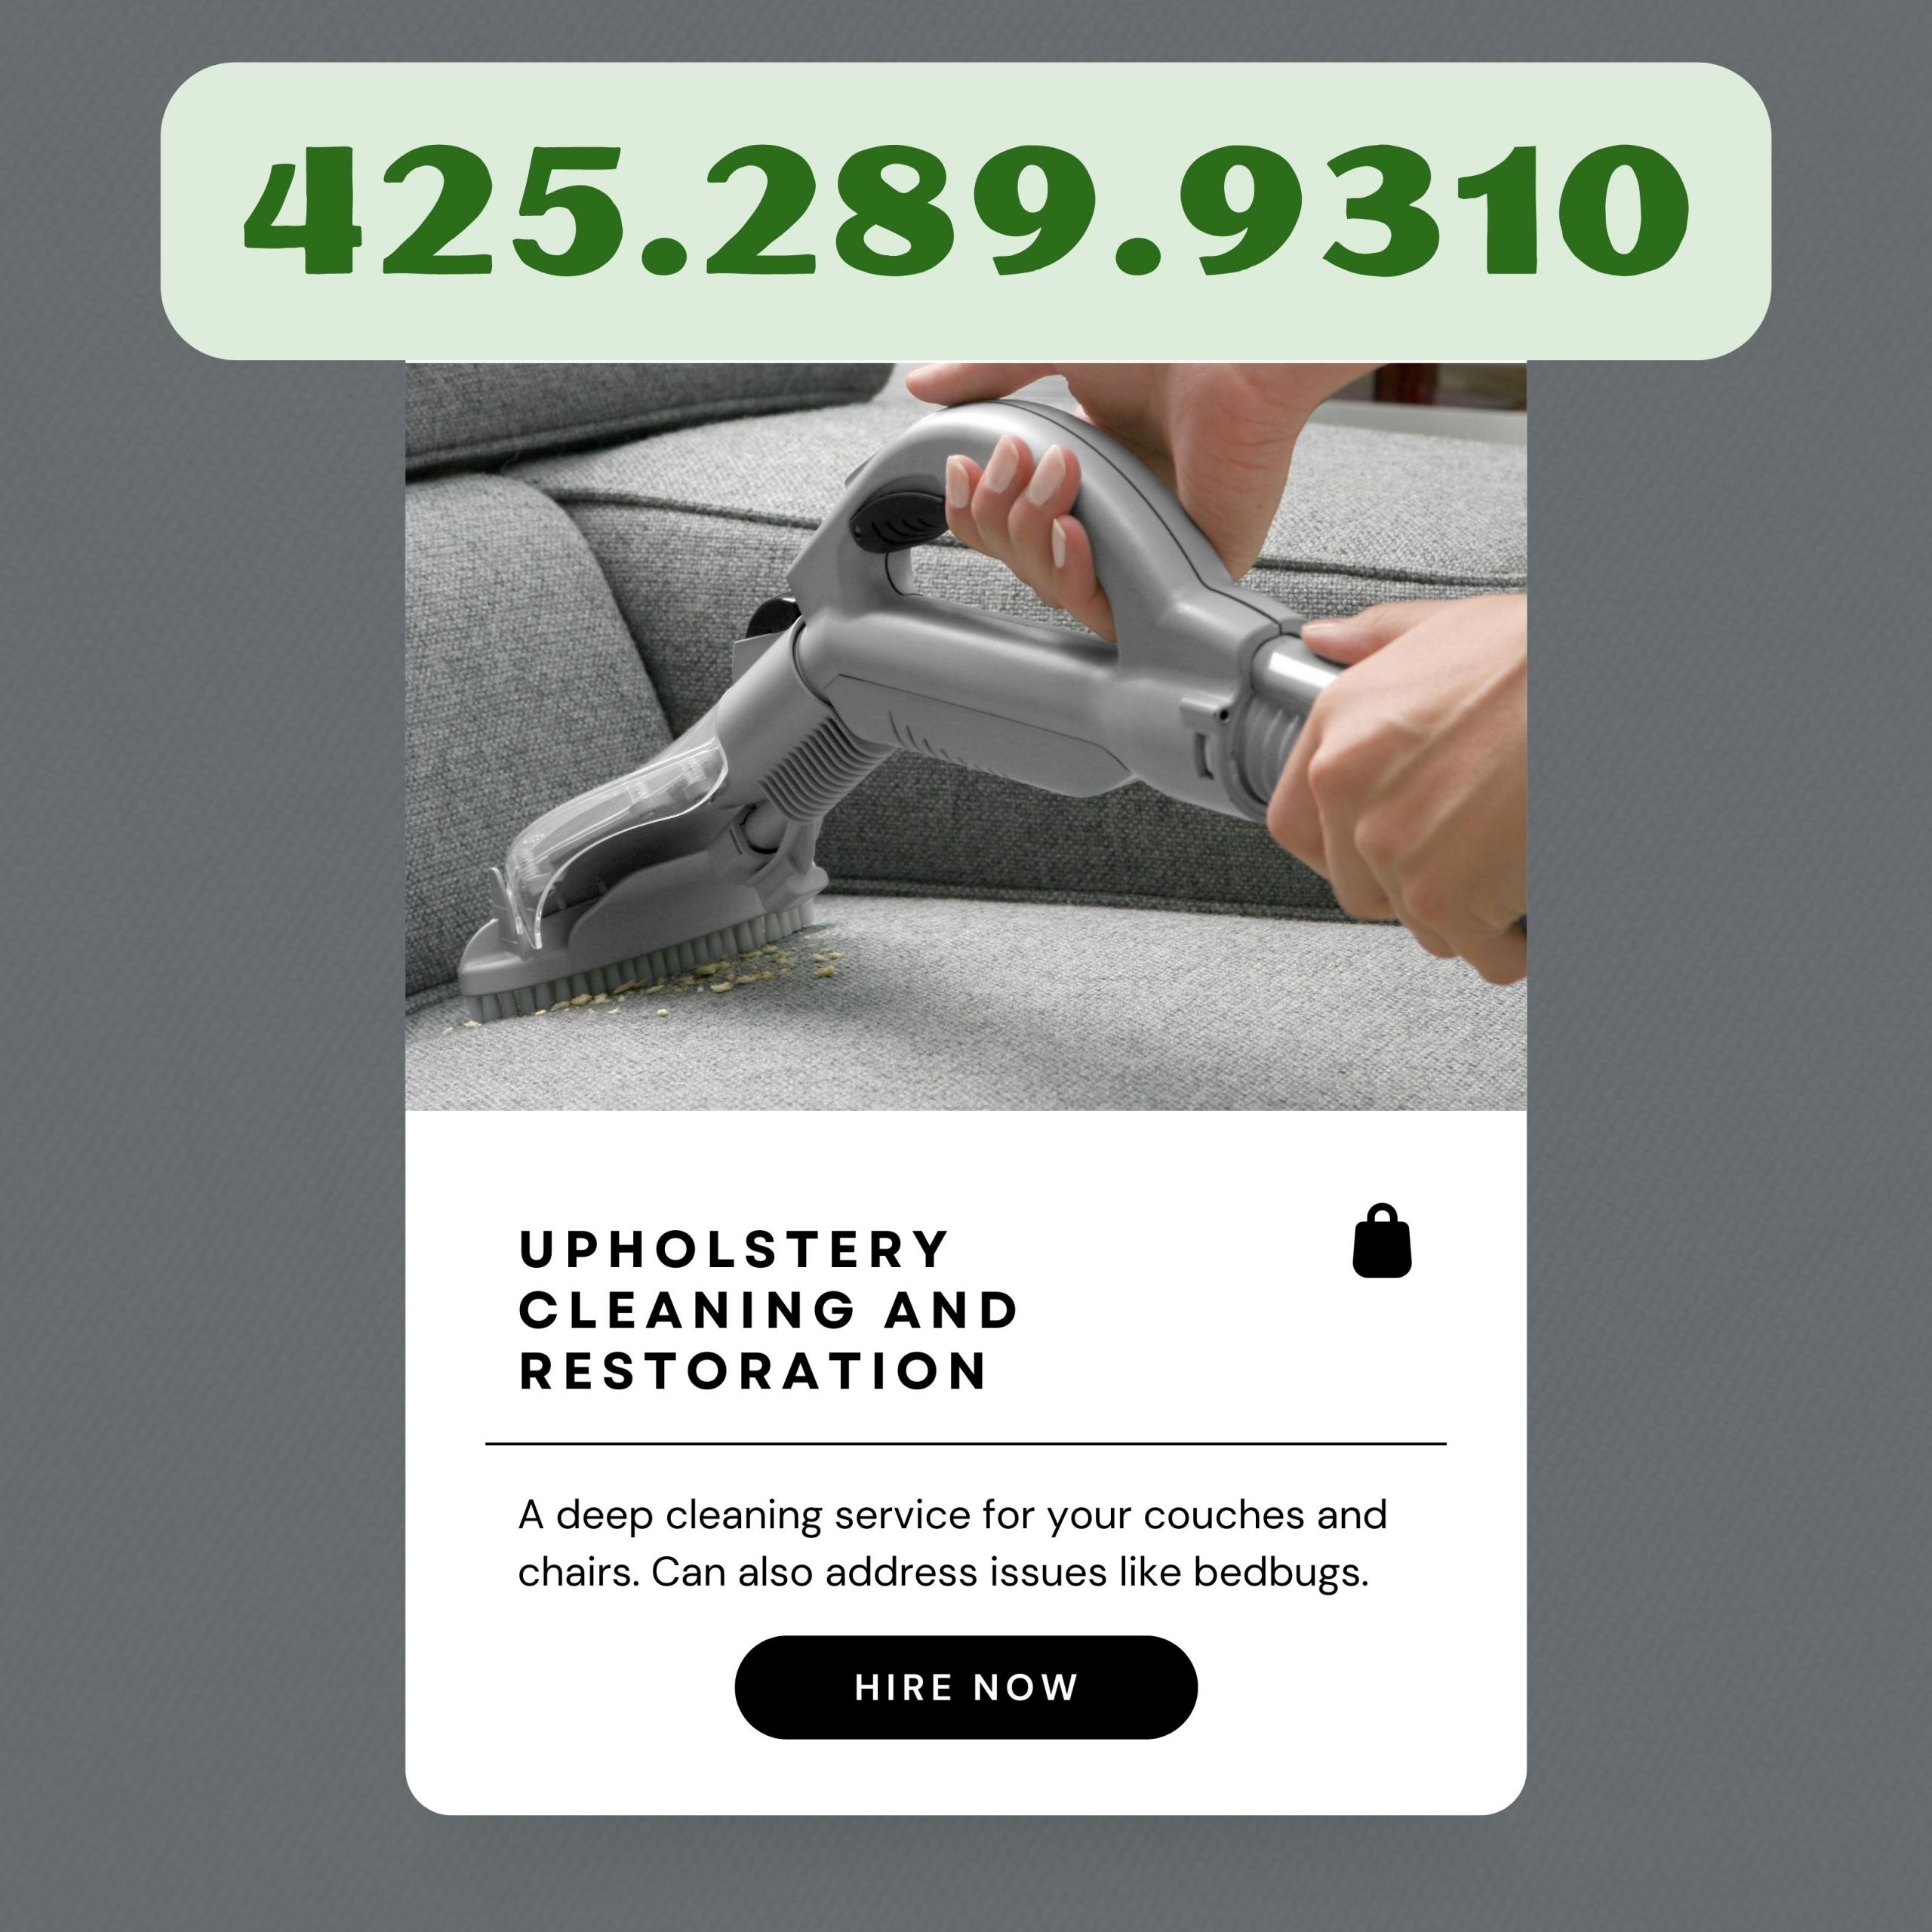
Tackle the Bathrooms
Now that you have gathered your cleaning supplies and are ready to tackle the bathrooms in your home let’s break down the process into two crucial steps: disinfecting surfaces and scrubbing fixtures. These vital tasks will make your bathroom look sparkling clean and help maintain a hygienic environment for you and your family.
Disinfect Surfaces
Tackle the first step by disinfecting all surfaces in the bathroom. Use a hospital-grade disinfectant to wipe down countertops, sinks, toilet seats, and other frequently touched areas. Pay special attention to light switches, faucet handles, and doorknobs, as these are hotspots for germs and bacteria. Let the disinfectant sit for a few minutes to effectively kill harmful pathogens before wiping it clean with a microfiber cloth.
Scrub Fixtures
Little details matter when it comes to cleaning your bathroom fixtures. Use a mild abrasive cleaner to scrub away soap scum and grime from faucets, showerheads, and drains. Don’t forget to clean the toilet bowl with a strong toilet cleaner to eliminate stubborn stains and odors. A thorough scrubbing of fixtures improves your bathroom’s appearance and prevents mold and mildew buildup.
You can further enhance the cleanliness of your bathroom by regularly cleaning your shower curtains, bath mats, and towels. These items can harbor harmful bacteria and mold if not washed and replaced frequently. Maintaining a consistent cleaning routine ensures your bathroom remains safe and sanitary for everyone in your household.
Refresh Bedrooms
Change Linens
Unlike other rooms, bedrooms accumulate dead skin cells, dust mites, and other allergens more quickly. Changing linens regularly is essential to maintaining a clean and healthy sleeping environment. Make it a habit to wash bed sheets, pillowcases, and duvet covers at least once a week in hot water to kill germs or dust mites.
An additional tip: Consider using mattress and pillow protectors to add an extra layer of defense against allergens and dust mites. These protectors can be easily washed to ensure a fresh and clean sleeping surface.
Changing linens frequently and investing in quality protectors can significantly improve your bedroom’s cleanliness and comfort, leading to better sleep and overall health.
Dust Furniture
Bed furniture collects dust and debris over time, exacerbating allergies and respiratory issues. Dusting your furniture regularly is crucial to maintain a healthy living space. Using a microfiber cloth or electrostatic duster, gently wipe down all surfaces, including dressers, nightstands, and headboards.
Any missed spots can harbor dust mites and other allergens, so be thorough in your dusting routine. Pay special attention to overlooked areas, such as under the bed and behind furniture. Remember to dust and wipe down decorative items like picture frames or lamps.
Dusting furniture enhances your bedroom’s cleanliness and prolongs your furniture’s life by preventing dust buildup that can cause damage over time. Make it a regular cleaning routine to enjoy a fresh, allergen-free bedroom environment.
Deep Clean Kitchen
 Once again, it’s time to tackle the daunting task of deep cleaning your kitchen. By following these steps, you’ll achieve a sparkling, clean space that looks great and promotes a healthier environment for cooking and dining.
Degrease Appliances
Start by degreasing your kitchen appliances to remove built-up grime and grease. Mix a solution of warm water and dish soap, then use a sponge or microfiber cloth to wipe down the surfaces of your stove, microwave, and oven. Pay special attention to the hood above your stove, as this area collects a lot of grease. You may need a non-abrasive cleaner or a mixture of baking soda and water for stubborn grease spots. Once you’re done, dry the appliances thoroughly with a clean towel to prevent streaks.
Sanitize Countertops
For an effective deep clean, sanitize your kitchen countertops to eliminate harmful bacteria and germs. Using a mixture of equal parts water and white vinegar, spray the solution onto your countertops and let it sit for a few minutes to disinfect. Then, wipe down the surfaces with a clean cloth or paper towel. Pay special attention to areas near the sink and food prep areas, as these are common spots for bacteria to thrive. To ensure thorough sanitization, consider using a commercial disinfectant that is safe for use on your specific countertop material.
Clean your kitchen countertops regularly to maintain a hygienic cooking environment. Remove food crumbs and spills promptly to prevent bacterial growth and cross-contamination. Consider implementing a daily cleaning routine that includes wiping down the countertops with a mild cleaner or disinfectant after each meal preparation. You’ll enjoy a safe and inviting kitchen space for years by staying on top of cleanliness.
Vacuum Carpets & Rugs
Remove loose dirt
Removing loose dirt and debris before entering into a deep clean of your carpets and rugs is crucial. Review the surface thoroughly using a vacuum cleaner with strong suction power. Make sure to pay extra attention to high-traffic areas where dirt tends to accumulate the most. Additionally, using a handheld vacuum or attachments can help reach corners and edges that the central vacuum might miss.
Allowing dirt to build up on your carpets makes them look unkempt and can lead to premature wear and tear. By regularly vacuuming and removing loose dirt, you not only improve the appearance of your carpets but also prolong their lifespan. This simple step sets the foundation for a more thorough cleaning process, ensuring better results in the long run.
Recall consistency is vital when it comes to maintaining clean carpets. Make it a habit to vacuum at least once a week, if not more frequently, depending on foot traffic and other factors. It’s a small task that can make a big difference in your home’s cleanliness and health.
Spot clean stains
Any spills or stains on your carpets should be addressed promptly to prevent them from setting in and becoming more challenging to remove. Keep a carpet stain remover or a homemade solution on hand for quick action when accidents happen. Blot the stain with a clean cloth or paper towel to absorb as much liquid as possible before applying the cleaning solution. Always test the product on a small, inconspicuous area first to ensure it doesn’t cause any damage to the carpet fibers.
For instance, avoid rubbing the stain vigorously, which can spread the spill and damage the carpet fibers. Instead, gently blot and lift the stain to prevent it from settling more deeply into the carpet. Acting swiftly and using the right cleaning products can make a significant difference in successfully removing stains and preserving the appearance of your carpets.
Mop Hard Floors
Choose the Right Cleanser
The key to effectively cleaning hard floors is using the right cleanser. Choosing the appropriate cleaner will ensure your floors are clean and help maintain their quality over time. Before purchasing a cleaner, consider the type of flooring you have. Using the wrong cleanser can damage your floors, so it’s crucial to read labels carefully and select a product suitable for your specific flooring material. For example, if you have tile floors, you’ll want to avoid acidic cleaners as they can eat away at the grout.
When in doubt, opt for a neutral pH cleaner, which is safe for most hard floors. Make sure to dilute the cleanser according to the manufacturer’s instructions to avoid leaving behind a sticky residue on your floors. Regularly cleaning with the right cleanser will keep your floors looking great and extend their lifespan.
Remember to test the cleanser in a small, inconspicuous area before using it on the entire floor to ensure it doesn’t cause any damage. Following the manufacturer’s recommendations will help you achieve optimal cleaning results without risking harm to your floors.
Dry after Mopping
After mopping your hard floors, it’s crucial to dry them properly to prevent any water damage. Excess moisture left on the floors can seep into cracks and crevices, causing warping or discoloration over time. To ensure your floors dry wholly and quickly, consider using a microfiber cloth or mop to soak up any remaining moisture. Allowing your floors to air dry naturally can lead to water spots and streaks, so it’s best to take matters into your own hands.
Investing in a floor fan or opening windows to improve air circulation can also help expedite drying. Creating a dry environment will protect your floors and prevent mold and mildew growth, which thrive in damp conditions. By drying your hard floors after mopping thoroughly, you’ll maintain their pristine appearance and structural integrity for years.
For instance, if you have hardwood floors, excess moisture can cause them to swell and warp, leading to costly repairs or replacements. Properly drying your floors after mopping is a simple yet crucial step in your cleaning routine that can make a significant difference in the long-term maintenance of your hard floors.
Organize and Tidy
Rearrange efficiently
Not having a systematic approach to rearranging can lead to wasted time and effort. Even if your home may look tidy, optimizing the layout can significantly impact your everyday life. Start by decluttering items that do not belong in a particular room. Next, consider the flow of your space and how you move within it regularly. This can help you choose a more functional arrangement that suits your needs.
Once you have decluttered and planned your layout, focus on storage solutions that work for you. Utilize bins, baskets, and shelves to keep items organized and easily accessible. Labeling containers can also save time when trying to locate specific items. Remember that the key to efficient rearranging is to create a system that is easy to maintain in the long run.
Lastly, make sure to reassess your rearranged spaces regularly. As your needs and lifestyle change, so should your home’s organization. By periodically revisiting and refining your layout, you can ensure your home remains functional and clutter-free.
Maintain regularly
You may think your job is done once you’ve organized and tidied your home. However, maintenance is critical to keeping your space in top shape. You don’t want all your hard work to go to waste, so developing a routine for tidying up is crucial. Even spending 10-15 minutes daily can make a significant difference in the long run.
Plus, maintaining your home regularly not only keeps it neat but also prevents the accumulation of dust and dirt, which can lead to allergies and other health issues. Consistency in your cleaning routine will help you avoid potential problems and enjoy a clean and healthy living environment.
Remember that maintaining regular is not just about appearances; it’s about creating a space that promotes well-being and efficiency. By incorporating cleaning tasks into your daily or weekly schedule, you can ensure that your home remains a pleasant and welcoming place for you and your family.
Final Words
This comprehensive guide to house cleaning will undoubtedly lead to sparkling results in your home. Incorporating these ten steps into your cleaning routine ensures that every corner of your living space is tidy, organized, and free of dirt and clutter. This will create a more pleasant and welcoming environment for you and your family and contribute to a healthier and more efficient living space.
Consistency is vital when it comes to maintaining a clean and organized home. By establishing a regular cleaning schedule and sticking to the techniques outlined in this guide, you can easily stay on top of household chores and prevent dirt and grime from building up over time. Note that a little effort goes a long way in keeping your home looking its best. With dedication and commitment, you can achieve sparkling results that will make you proud to show off your living space to friends and family.
So why wait? Start implementing these ten house cleaning steps today and transform your home into a pristine sanctuary you can enjoy daily. With the right tools, techniques, and mindset, maintaining a clean and organized living space doesn’t have to be daunting. By following these simple yet effective guidelines, you can achieve a level of cleanliness and freshness that will leave you satisfied and accomplished. Here’s to a sparklingly clean home!
FAQ
Q: Why is house cleaning necessary?
A: House cleaning is essential for creating a comfortable and healthy living environment. It helps reduce clutter, eliminate germs, and improve indoor air quality.
Q: How often should I clean my house?
A: You should clean your house at least once weekly to maintain a clean and tidy space. However, the frequency may vary depending on your household size and lifestyle.
Q: What are the imperative tools for house cleaning?
A: Essential tools for house cleaning include a vacuum cleaner, microfiber cloths, mop, scrub brush, duster, and cleaning solutions such as all-purpose cleaners and disinfectants.
Q: What are some tips for effective house cleaning?
A: Some tips for effective house cleaning include creating a cleaning schedule, decluttering regularly, using the right cleaning products for different surfaces, and tackling one room at a time.
Q: How can I make house cleaning more manageable?
A: You can make house cleaning more manageable by breaking down tasks into smaller steps, enlisting help from family members, and staying organized with a cleaning checklist.
Q: What are the benefits of following a house cleaning routine?
A: Following a house cleaning routine helps maintain a clean and organized home, reduces stress, enhances productivity, and promotes overall well-being for you and your family.
Q: How can I achieve sparkling results with house cleaning?
A: To achieve sparkling results with house cleaning, follow these ten steps: declutter, dust surfaces, clean glass and mirrors, vacuum carpets and floors, mop hard floors, scrub bathrooms and kitchen, change bedding, tackle laundry, organize common areas, and add final touches like air fresheners.
| Some of the Cities We Serve | |||
| Auburn WA 98001 | Kent WA 98031 | Seattle WA 98102 | Seattle WA 98144 |
| Auburn WA 98002 | Kent WA 98032 | Seattle WA 98103 | Seattle WA 98145 |
| Auburn WA 98054 | Kent WA 98035 | Seattle WA 98104 | Seattle WA 98146 |
| Auburn WA 98092 | Kent WA 98042 | Seattle WA 98105 | Seattle WA 98151 |
| Bellevue WA 98004 | Kent WA 98064 | Seattle WA 98106 | Seattle WA 98154 |
| Bellevue WA 98005 | Kent WA 98089 | Seattle WA 98107 | Seattle WA 98155 |
| Bellevue WA 98006 | Kirkland WA 98033 | Seattle WA 98108 | Seattle WA 98161 |
| Bellevue WA 98007 | Kirkland WA 98034 | Seattle WA 98109 | Seattle WA 98164 |
| Bellevue WA 98008 | Kirkland WA 98083 | Seattle WA 98111 | Seattle WA 98165 |
| Bellevue WA 98009 | Lake Forest Park WA 98155 | Seattle WA 98112 | Seattle WA 98168 |
| Bellevue WA 98015 | Lynnwood WA 98036 | Seattle WA 98113 | Seattle WA 98170 |
| Bothell WA 98011 | Lynnwood WA 98037 | Seattle WA 98114 | Seattle WA 98171 |
| Bothell WA 98012 | Lynnwood WA 98046 | Seattle WA 98115 | Seattle WA 98174 |
| Bothell WA 98021 | Medina WA 98039 | Seattle WA 98116 | Seattle WA 98175 |
| Bothell WA 98041 | Mercer Island WA 98040 | Seattle WA 98117 | Seattle WA 98177 |
| Burien WA 98148 | Newcastle WA 98059 | Seattle WA 98118 | Seattle WA 98178 |
| Burien WA 98166 | Redmond WA 98052 | Seattle WA 98119 | Seattle WA 98181 |
| Clyde Hill WA 98004 | Redmond WA 98053 | Seattle WA 98121 | Seattle WA 98184 |
| Des Moines WA 98198 | Redmond WA 98073 | Seattle WA 98122 | Seattle WA 98185 |
| Edmonds WA 98020 | Redmond WA 98074 | Seattle WA 98124 | Seattle WA 98190 |
| Edmonds WA 98026 | Renton WA 98055 | Seattle WA 98125 | Seattle WA 98191 |
| Federal Way WA 98003 | Renton WA 98056 | Seattle WA 98126 | Seattle WA 98194 |
| Federal Way WA 98023 | Renton WA 98057 | Seattle WA 98127 | Seattle WA 98195 |
| Federal Way WA 98063 | Renton WA 98058 | Seattle WA 98129 | Seattle WA 98199 |
| Federal Way WA 98093 | Renton WA 98059 | Seattle WA 98131 | Tukwila WA 98100 |
| Issaquah WA 98027 | Sammamish WA 98074 | Seattle WA 98132 | Vashon WA 98013 |
| Issaquah WA 98029 | Seahurst WA 98062 | Seattle WA 98133 | Vashon WA 98070 |
| Issaquah WA 98075 | Seatac WA 98158 | Seattle WA 98134 | West Seattle WA 98116 |
| Juanita WA 98033 | Seatac WA 98188 | Seattle WA 98136 | Yarrow Point WA 98004 |
| Kenmore WA 98028 | Seattle WA 98028 | Seattle WA 98138 | |
| Kent WA 98030 | Seattle WA 98101 | Seattle WA 98139 | |
Our Seattle Office
https://g.page/tha-house-cleaning-service
https://goo.gl/maps/gAny2HrqVoVev9zo9
https://g.page/r/CdUfsV_m5q9CEBA
https://g.page/r/CdUfsV_m5q9CEAE
https://maps.google.com/?cid=4805313204549918677
https://www.google.com/maps?cid=4805313204549918677
Our Mercer Island Office
https://goo.gl/maps/Wt9QoWdKBLLcW46L6
https://g.page/r/CcTBwjFfdJsIEBA
https://g.page/r/CcTBwjFfdJsIEAE
https://local.google.com/place?id=620217325899137476&use=srp&ved=1t%3A65428#fpstate=lie
https://local.google.com/place?id=620217325899137476&use=srp
https://maps.google.com/maps?cid=620217325899137476